


OLA!
Welcome, to my very first blog! I am excited to start a new journey of blogging on Hashnode.
Splash Screen according to me is one of the most essential aspects of grasping the interest of the user, as it is the first thing that a user sees in the app. With a good splash screen, you can grow the interest of the user with a good first impression. However, with Unity, you get the Unity Logo as the default splash screen and can not remove it unless you go for a paid solution. But if you still want to add a custom splash screen to your project, you can follow this blog where I will explain how to execute it in straightforward steps.
So, to start with firstly I would like to share how I got the idea to use a custom splash screen. I participated in a Hackathon and worked on a project related to an AR-based Ed-tech app for kids. I knew it was essential to have an excellent first impression on the judges and users of the app to make them interested in our project so I thought of applying a custom splash screen to my project.
The prerequisites:
Before we start making a custom splash screen, make sure you have the following:
Unity Installed, I have used the 2021.3.23f1 version.
Visual Studio.
Basic familiarity with Unity's Interface and scene management.
A video/animation for a custom splash screen.
Setting up the project
Start with creating a new project or adding a new scene to your existing project. In my case, I will go with creating a new scene in my current project. To add a new scene right-click in the Assets/Scenes folder > Create > Scene.

Now open the scene and import the video or animation into your project. To import go to Assets > Import New Asset and add the asset or you can also simply drag and drop the video.
Preparing the scene
Now we prepare the scene,
For starters, create a texture folder, and in that add a render texture and name it video player. In the assets folder right-click Create > Folder, and name it accordingly. After that in the Texture folder right-click Create > Render Texture.

Now select the render texture and in the inspector panel make sure you have these values:
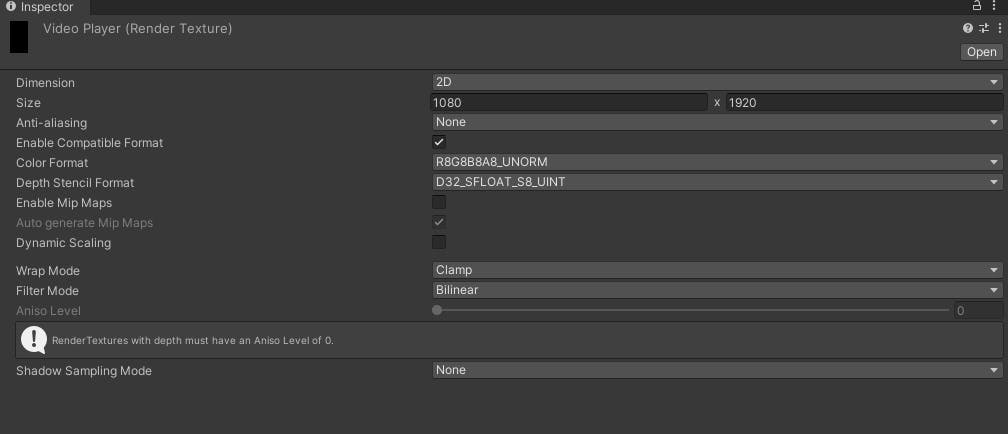
Here we set the size according to the target screen size.
Now in the hierarchy panel right-click > UI > Canvas. This step will add a canvas to your project which will help you set up the UI for your project. After you add the canvas, right-click on the canvas game object > UI > raw image.

Select this raw image game object and lock it in the inspector panel:

Now in the inspector panel go to Rect-Transform > Anchor Presets and select the downright option in the stretch section while pressing the alt/option key.
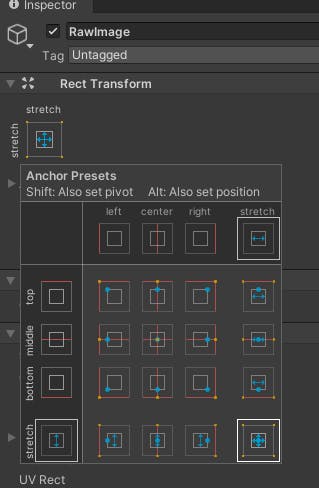
This will stretch the image across the canvas and it will look like this:

After this go to Assets > Texture > Video Player and drag this to the texture of the raw image

Now whenever the app runs this scene it will render this texture. After this step unlock the inspector panel.
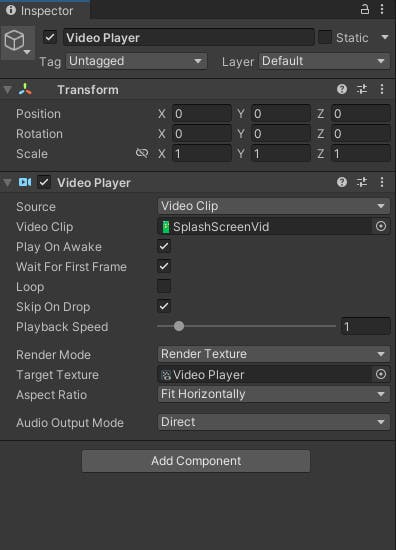
Now go again to the hierarchy panel and right-click > Video > Video Player, this will add the video player component to the scene.
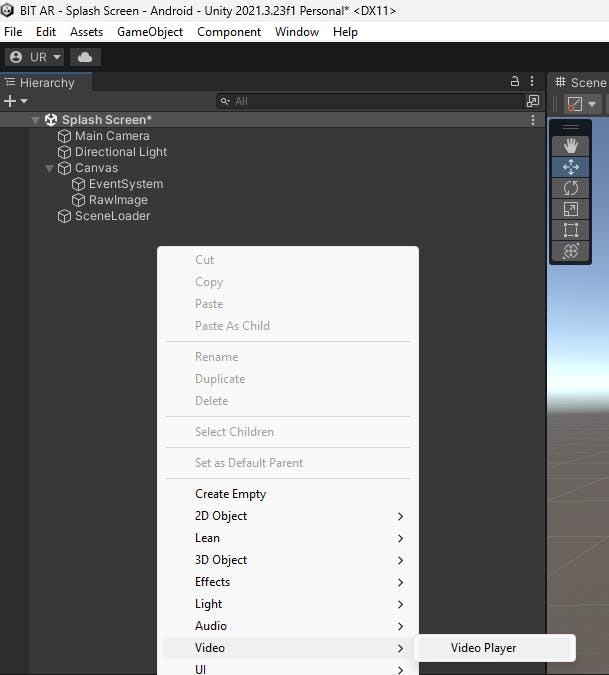
Now in the Video player component add the video/animation in the Video Clip section and in Video Player Texture in the Target Texture.
Scripting for Scene Change
After setting up the scene in the editor, we will create a Script to handle scene management so that the scene changes after the video/animation is played.
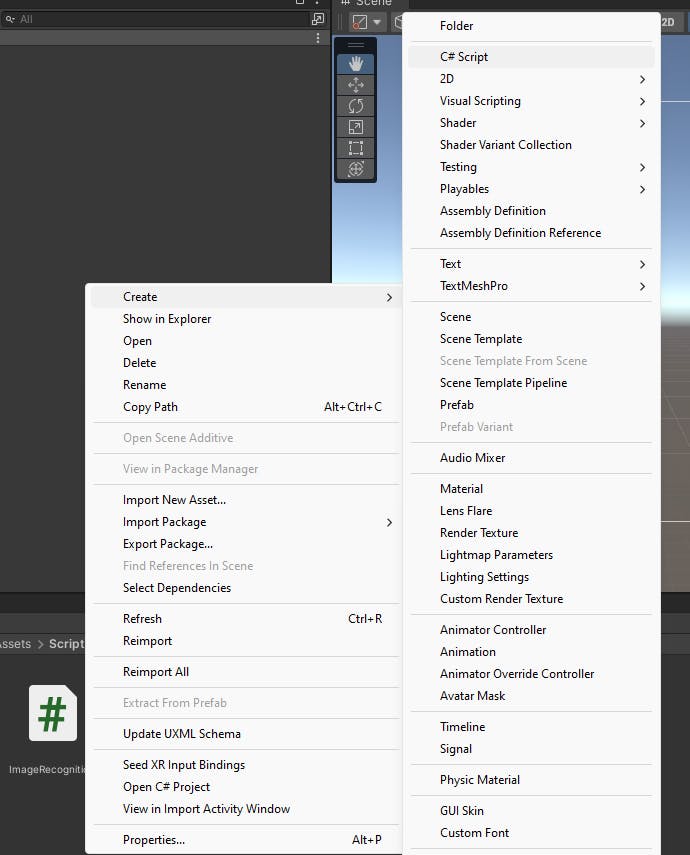
Now, create a folder named scripts in the Assets folder, right-click Assets > Create > Folder. In the scripts, folder create a C-sharp script right-click in the folder Create > C# Script.
Name the script whatever you want just don't add space between the name, I have named my script SplashScreen.
Open the script, you will find this already written:
 using System.Collections;
 using System.Collections.Generic;
 using UnityEngine;

 public class SplashScreen : MonoBehaviour
 {
     // Start is called before the first frame update
     void Start()
     {

     }

     // Update is called once per frame
     void Update()
     {

     }
 }
Let me share some basic information about this script, the void start() function is called only once i.e. when the scene is first loaded and the void update() function is called once after every frame so, here we will only need the void update() function.
 using System.Collections;
 using System.Collections.Generic;
 using UnityEngine;
 using UnityEngine.SceneManagement;

 public class SplashScreen : MonoBehaviour
 {
     [SerializeField]
     private float delaytoLoad = 3f;
     private float timeSpent;
     // Update is called once per frame
     void Update()
     {
         timeSpent += Time.deltaTime;
         if (timeSpent > delaytoLoad)
         {
             SceneManager.LoadScene(1);
         }
     }
 }
Here,
delaytoLoad is the duration of the animation that will be played.
timeSpent This will store the time spent on the scene and will later help to change the scene.
In the void update() function we store the time spent on this scene using Time.deltaTime. Once we have the time spent we just need to check whether it is more than the duration of the animation, so write an IF statement.
if (timeSpent > delaytoLoad) { SceneManager.LoadScene(1); }
In this, once the duration of time spent in this scene exceeds the duration of the animation a new scene will be loaded, I have used the integer value of the scene in the Scenes in Build Hierarchy you can also use the name of the scene.
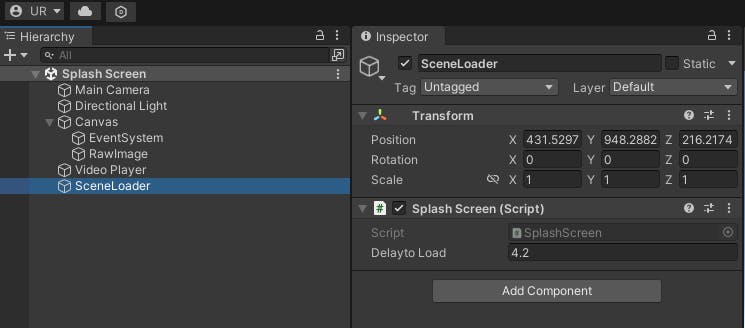
After we are done writing the script save the script and head to the Editor. Add an empty game object in the hierarchy panel, right-click > Create Empty. I have named this Scene Loader, now to this add the script via Add Component > SplashScreen or by simply dragging and dropping.
Building The Application
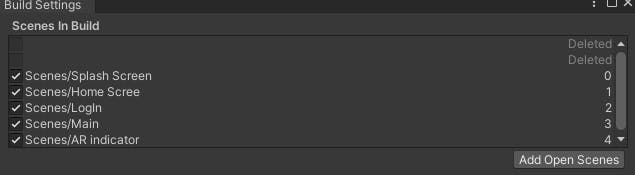
This is the last and final step in this tutorial, after we are done we are setting up the scene and scripting we move to building and testing. Before we test open the build settings simply by Ctrl+Shift+B and drag and drop the scenes in the scenes in build section keep the first scene(0th) the Splash Screen scene and after that whichever you want to load.
To test the build you can simply go to play mode and test it, Video should play and the next scene should open. If the test runs fine, head again to the Build Settings and build the application.
Conclusion
In this inaugural blog, I tried to explain how we can use a customized splash screen for your Unity project. Stay tuned for the next blogs where I will share more while I continue learning about this emerging tech.